
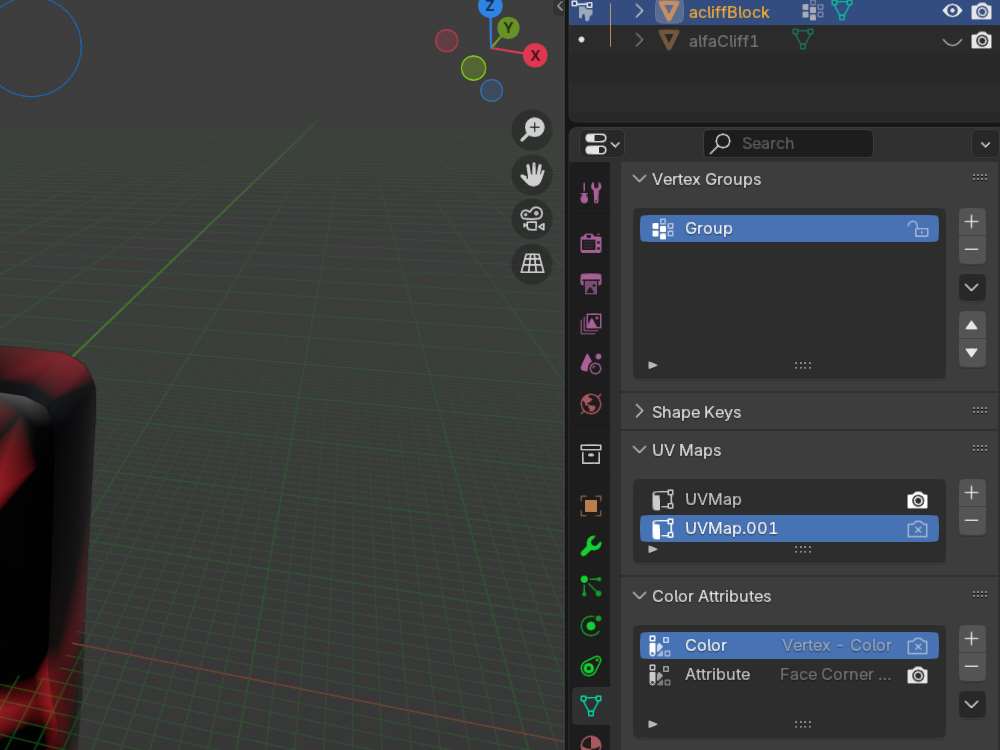
- BLENDER > OBJECT DATA (green triangle) > UV MAPS
- TWO UV maps: UVMap and UVMap.001 (click the +)
- VERTEX GROUPS: Group (click the +) and that’s all.
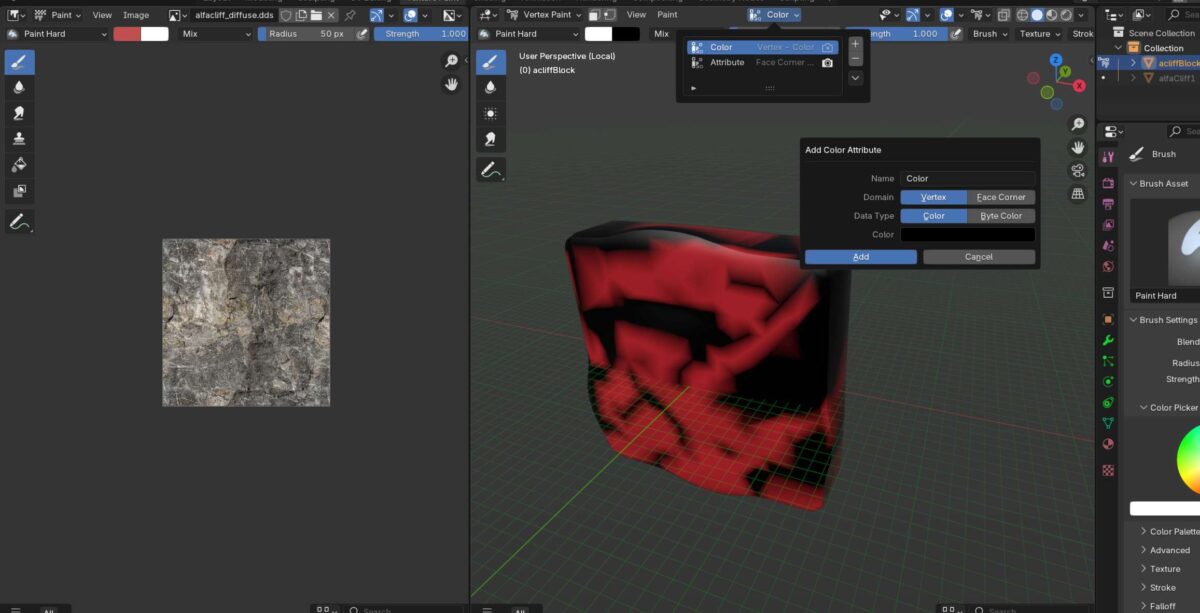
- COLOR ATTRIBUTES: COLOR – Vertex Color.
- COLOR ATTRIBUTES: ATTRIBUTE – Face Corner.
Steps 4-5 can also be set up inside the Texture Paint Workspace in Blender, as shown in the first image.
Once you have finished modifying the 3D mesh inside Blender, please export it to i3D and import it into GIANTS Editor.
Rain And Snow
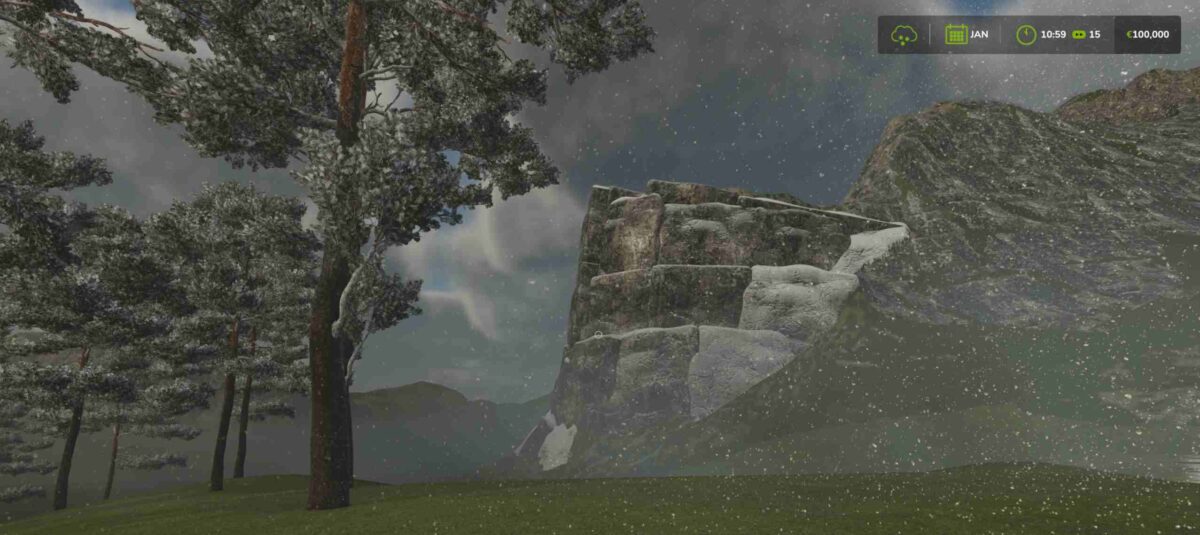
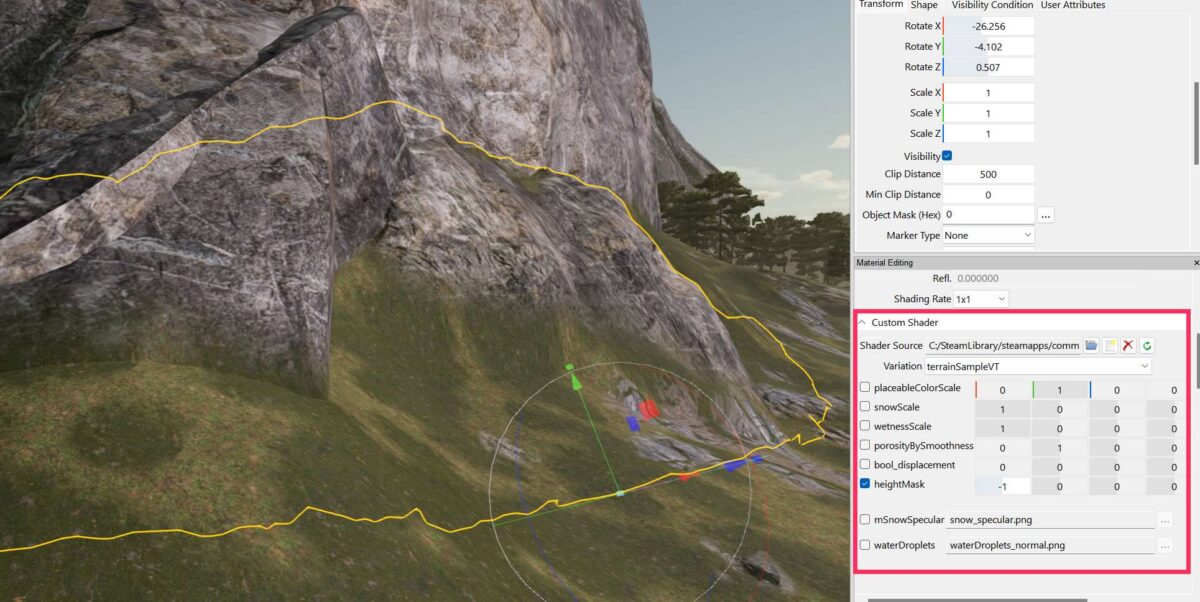
The thing is that this step is necessary if you want to have wetness/snow on the surface of a static mesh, such as this cliff rock (or cliff block) that I call it. Additionally, I would like to note that the Placeable Shader features several variations. Below is the cliff block inside GE, utilising terrainSampleVT, a visual effect that blends the terrain textures with the edges of the cliff. This is done even if heightMask is set to zero. A negative value will raise the blending so more of the objects’ mesh will be covered with the terrain textures painted on the terrain ground (map’s terrain plane).
So what is classical comical with GIANTS Editor, is that if you tick off something, like heightMask for example, it’s there lit to your eyes when the editor with your map is running. And when you close the editor and restart it again with the modded map, the ticked thing is not lit. So this is why opening the map.i3d in NotepadPlus is the backup solution.
First and foremost, please know the exact material name to which the Placeable Shader is attached to. Let’s have a go with that:
For my case, the material name is ziecliff_mat.
So from the XML code for map.i3d, this material has the following information:
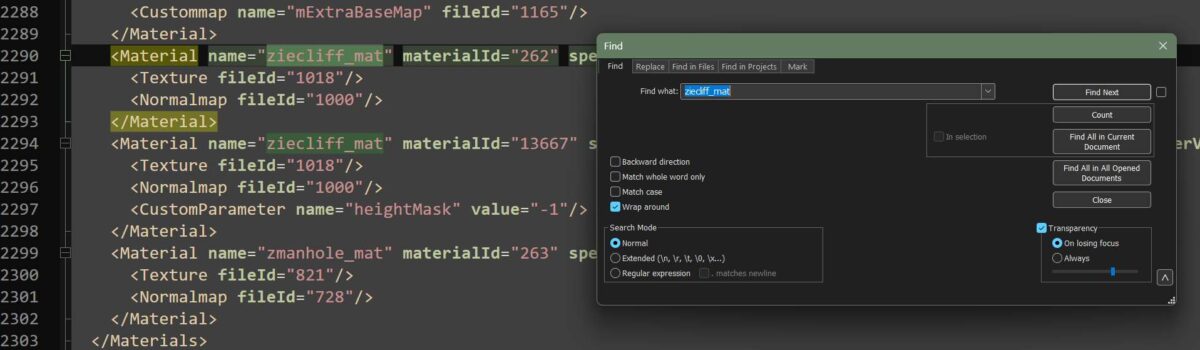
<Material name="ziecliff_mat" materialId="13667" specularColor="0.188235 1 0" customShaderId="851" customShaderVariation="terrainSampleVT">
      <Texture fileId="1018"/>
      <Normalmap fileId="1000"/>
      <CustomParameter name="heightMask" value="-1"/>
</Material>So that data was written, but not the other data… why? Here’s the solution:
<Material name="ziecliff_mat" materialId="13681" specularColor="0.188235 1 0" customShaderId="851" customShaderVariation="terrainSampleVT">
      <Texture fileId="1018"/>
      <Normalmap fileId="1000"/>
      <CustomParameter name="snowScale" value="0.87"/>
      <CustomParameter name="wetnessScale" value="0.95"/>
      <CustomParameter name="heightMask" value="-1"/>
</Material>The solution is to set snowScale and wetnessScale below 1 (one) to for example, 0.87 and 0.95 in GE. The data will now be saved to the map’s i3D. Or you can simply add these lines of data inside NotePad Plus. Additionally you may also use higher values than 1 (one).
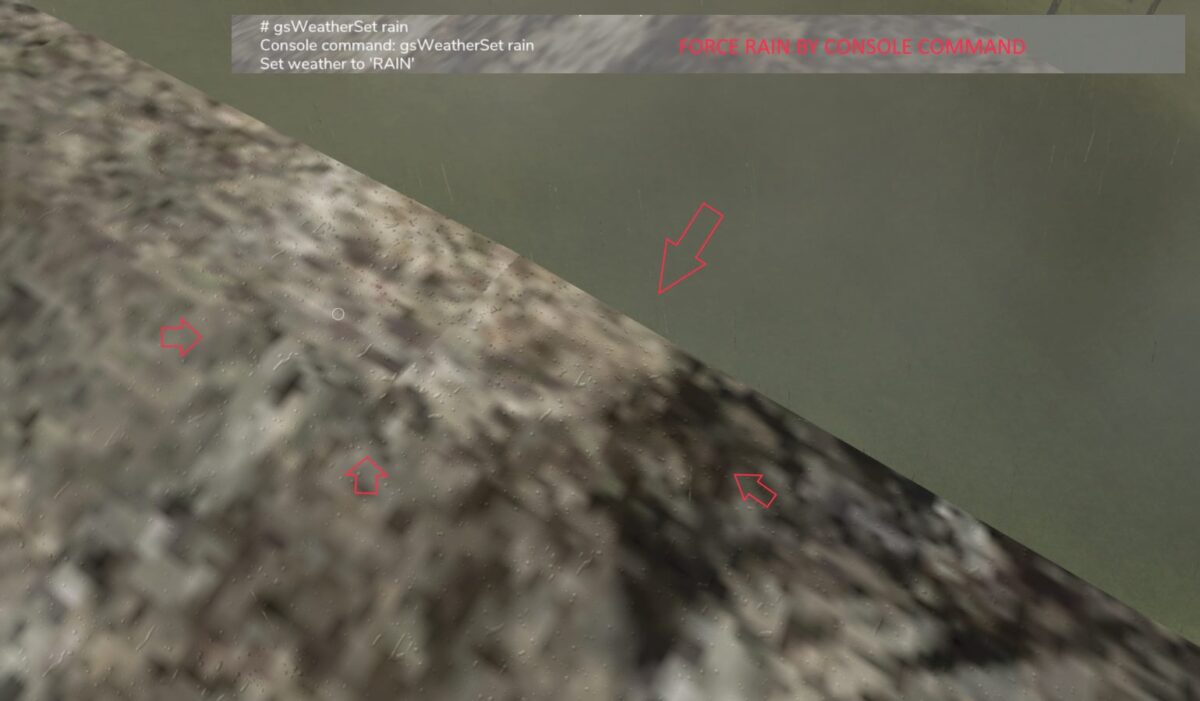
The things mentioned above are, of course, trial and error (in modder terminology), where you’ll have to experiment a bit to find your preferred outcome of applying such visual weather effects to your 3D meshes. They are only visuals alone and have no impact on player interaction or gameplay.
On some meshes, these droplets will be hardly visible unless the 3D mesh surface texture is way darker. It’s just visual raindrops on a surface.
On more metallic surfaces, it looks way more realistic.
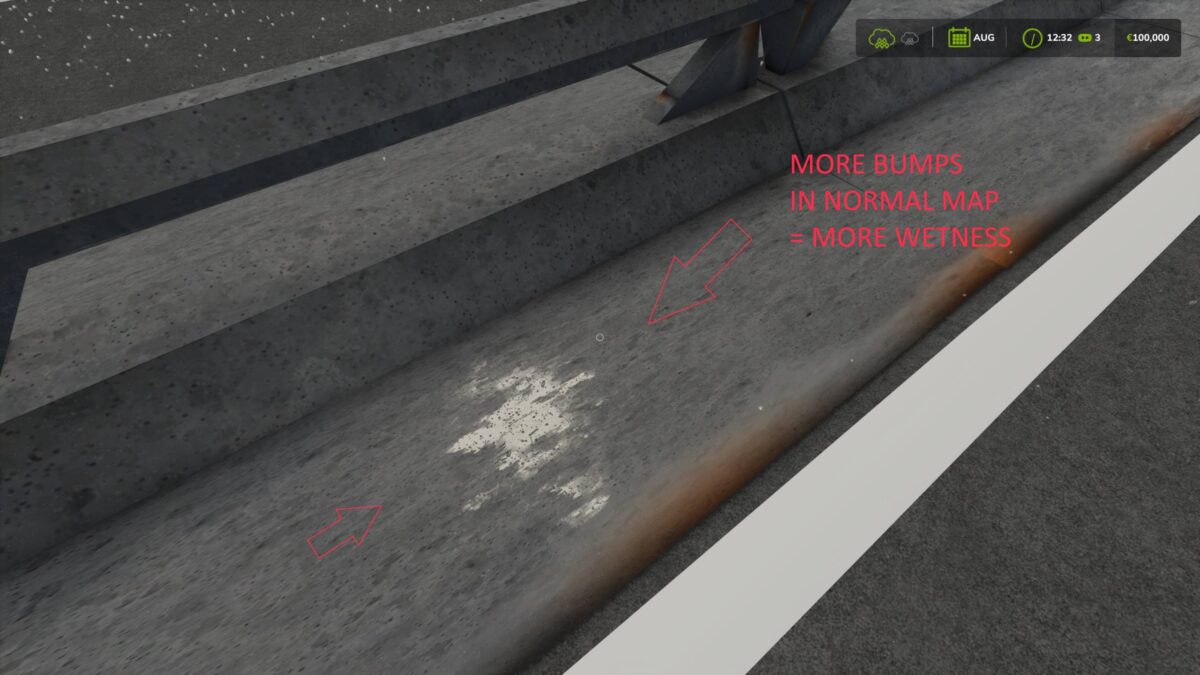
Depending on the relationship between Specular and Normal Maps, for which values these have, the values of these two will also impact the wetness. Alternatively, you may have a whole seasonal set of 3D meshes for each weather effect, which, of course, is a lot more work in terms of placing these in alignment with each other and using the weather mask that will load in those meshes accordingly to the specified weather condition:
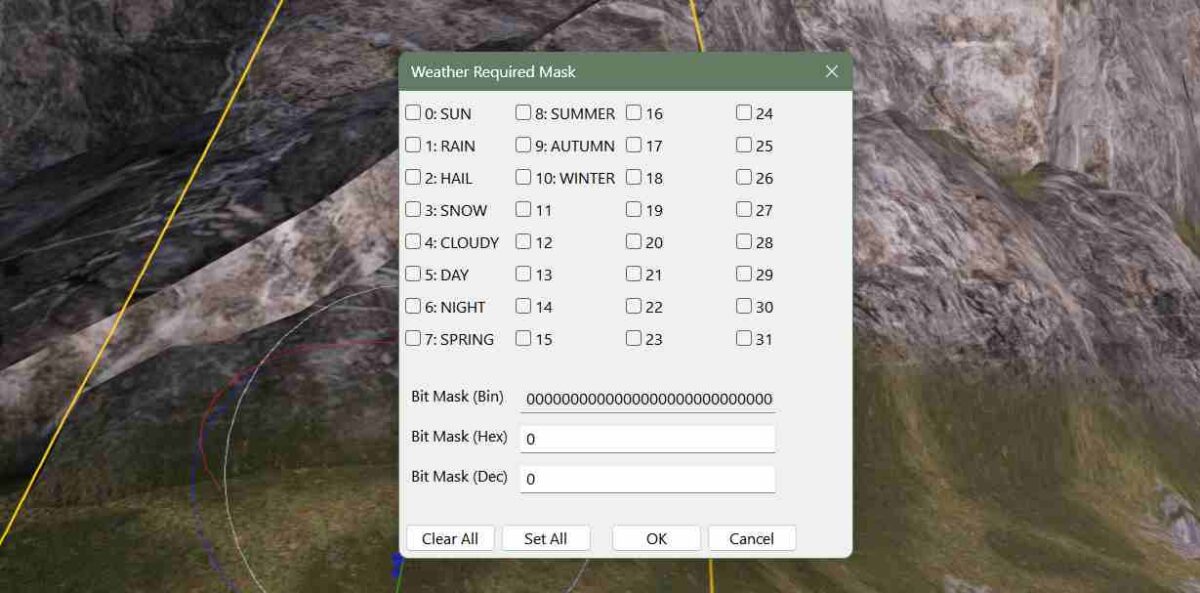
Best way is to place these meshes into transform groups, where for a cliff the transform groups would be (example):
- zieCliffSun
- zieCliffRain
- zieCliffHail
- zieCliffSnow
In that matter, you could use new materials that will be used for each season for that single 3D mesh, with variations in normal and specular maps, or even variations featured in shaders. And even so, variations in the diffuse map for each season.
At the end, this is pretty much experimental, and it’s up to you if you want to use this shader or just want to use seasonal texture maps instead for seasonal 3D meshes. Both works, but the last one is way more customizable.
Static Snow Meshes
GIANTS Software achieves this by creating 3D meshes that are linked to a weather mask. It means that a thick layer of snow on the top of a roof gets loaded in when it snows. That snow alone is just another 3D mesh object, within a weather/seasonal transform group.
In other words, this is not a texture layer that the Placeables Shader uses. This shader is essentially a texture layer shader, which uses either vanilla texture maps or texture maps specified by the map modder. All other seasonal weather effects are related to 3D meshes and their materials.