
I will first introduce you to this guide by covering the basics of how materials are used for assets used in the Farming Simulator before we move into an application called Materialize.
Materials are such a broad topic, and there is much information about textures and materials on the World Wide Web. Much of that information is highly valuable for your development of textures and materials since the Farming Simulator has plenty of visual surfaces rendered in high and low quality when you play the game. All these surfaces are using materials and shaders. So, let’s start with some basic information:
Texture mapping (according to Wikipedia) is a method for mapping a texture on a computer-generated graphic.
Now, I want to change this information to read “a method for mapping a texture onto a 3D mesh (like a primitive cube).” That sounds more within Blender’s language, right?
Maybe you aren’t a Blender user yet, but I highly recommend It as your main application for viewing and creating 3D meshes and materials. Modders within the Farming Simulator community mostly use Blender for this purpose.
What does a material look like?
Materials consist of several maps – more known as texture maps. Texture maps for Farming Simulator are mainly named in ways to identify the type of material map used, for example:
- mydiffusemap_diffuse.png – a diffuse/albedo map
- mynormalmap_normal.png – a normal map
- myspecularmap_specular.png – a specular map
You’ll likely not find files within a mod made for Farming Simulator that use file names such as ‘myalbedomap_albedo.png’ or ‘myglossmap_gloss.png’. This is mainly because GIANTS Software (the developer of Farming Simulator) is using specific file names, and that’s just the way it is…
The ending .png after the name tells us what type of data file this is. In this case it’s an image where the content is visual pixel data. I’m not going to go too much into that other than referring to Wikipedia – PNG.
But the main traits of a material used for a 3D-mesh/object inside Farming Simulator is:
- an albedo/diffuse map with a clear visual surface that looks more or less photographic
- a normal/bump/height map that looks more like color noise with some lines and shapes
- a specular/gloss map that looks like it has captured some lighting, but also looks more like color noise with lines and shapes.
Even if these maps looks weird or noisy, they are to be considered as visual pixel data. The data itself is what is shaping the visual surface/skin of a 3D mesh such as a cube.
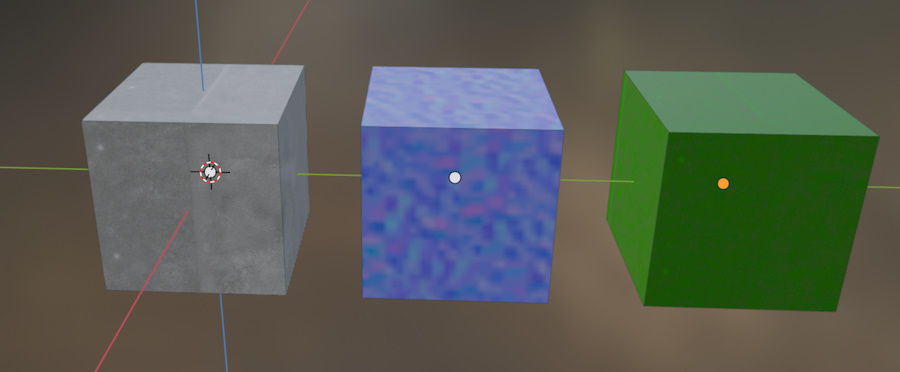
Materials added to a cube with a diffuse map, normal map and specular map.
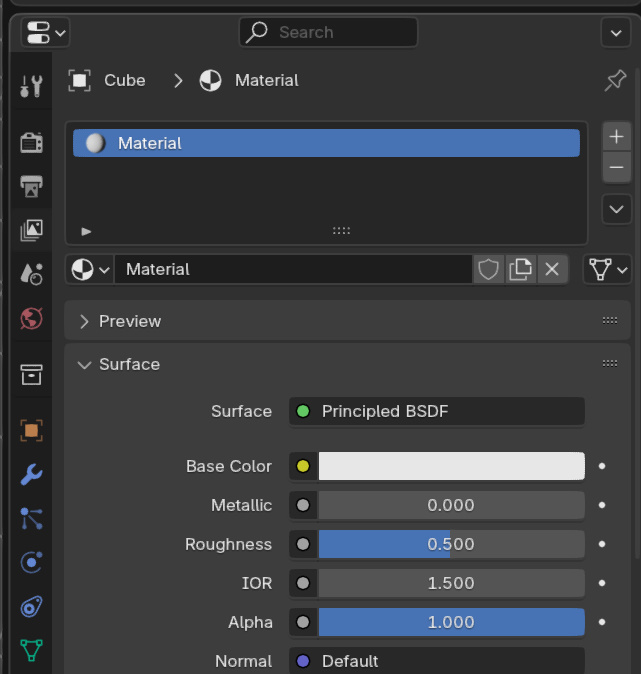

The thing here is that a material like the one you will see in Blender may have many different material maps attached to it. Inside GIANTS Editor, a material can have an Albedo Map, a Gloss Map, a Normal Map and an Emissive Map. These all are in a family relationship to the parent material. Why so?
When we study the source XML code for an I3D file, we will find lines such as these:
<Material name="flowerpot01_mat" materialId="1" customShaderId="4">
      <Texture fileId="1"/>
      <Normalmap fileId="2"/>
      <Glossmap fileId="3"/>
    </Material>
Other examples of ‘lines of texture maps’ are these:
<Material name="barn01_opaque_mat" materialId="5" customShaderId="4" customShaderVariation="colorScale_customParallax">
      <CustomParameter name="colorScale0" value="1 0.64 0.56 0.2"/>
      <CustomParameter name="colorScale1" value="1 1 1 1.0"/>
      <CustomParameter name="colorScale2" value="0.83 0.66 0.65 0.5"/>
      <CustomParameter name="colorScale3" value="0.08 0 0 0.3"/>
      <CustomParameter name="colorScale4" value="0.82 0.37 0.43 0.45"/>
      <CustomParameter name="colorScale5" value="0.44 0.6 0.79 0.5"/>
      <CustomParameter name="colorScale6" value="0.83 0.7 0.7 0.8"/>
      <CustomParameter name="dirtMossMix" value=".63 .36"/>
      <CustomParameter name="dirtMossSmoothness" value="0.12 0.12"/>
      <CustomParameter name="dirtMossTint" value="-0.1 -0.03 0.8"/>
      <CustomParameter name="porosityBySmoothness" value="0.0 1.0"/>
      <Custommap name="mDirtDiffuse" fileId="5"/>
      <Custommap name="mMaskMap" fileId="6"/>
      <Custommap name="mMossDiffuse" fileId="7"/>
      <Custommap name="mParallaxMap" fileId="8"/>
      <Texture fileId="1"/>
      <Normalmap fileId="2"/>
      <Glossmap fileId="3"/>
    </Material>
So the material name is flowerpot01_mat, and the other example barn01_opaque_mat. For the decorative flower pot, it looks like this in the material panel for this specific I3D object:
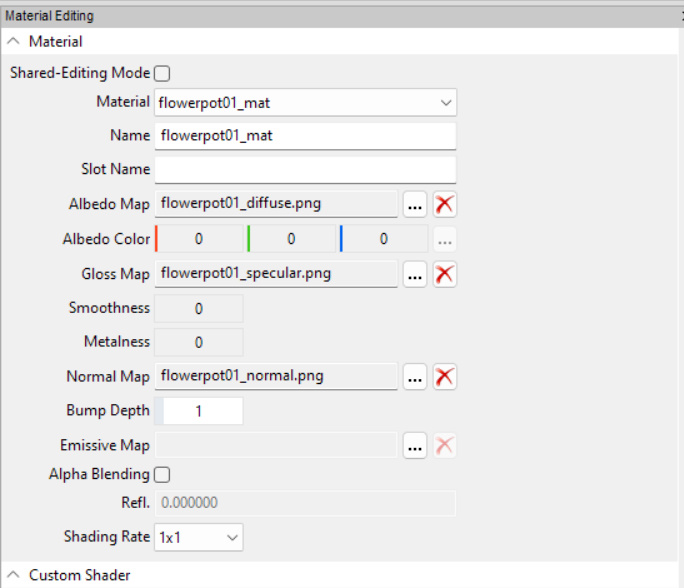
As you can see, it has its material name, the albedo map, gloss map and normal map pointing to individual texture files. These files (that are ending with a .png) can be viewed inside an image editor, such as Adobe Photoshop, GIMP, Paint.NET and other applications.
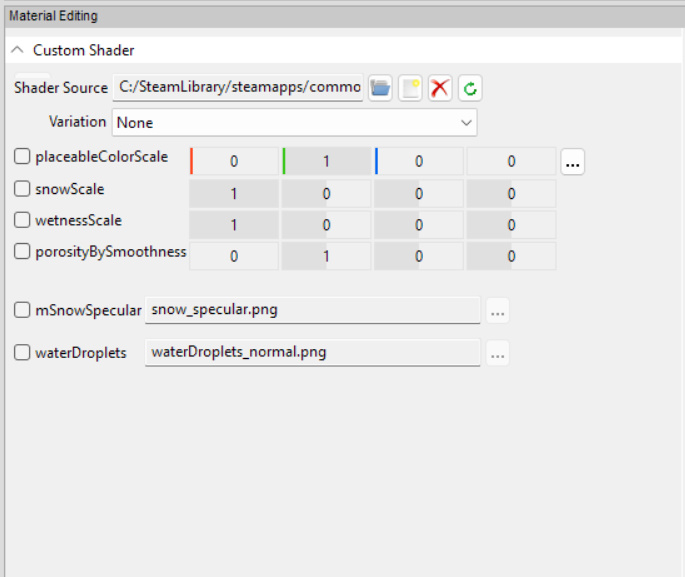
The other lines are related to a shader this material is using – a placeable shader called placeableShader.xml. That shader is referenced to as customShaderId=”4″ where the 4 is related to these lines of XML code:
<Files>
    <File fileId="1" filename="$data/maps/mapUS/textures/props/flowerpot01_diffuse.png" />
    <File fileId="2" filename="$data/maps/mapUS/textures/props/flowerpot01_normal.png" />
    <File fileId="3" filename="$data/maps/mapUS/textures/props/flowerpot01_specular.png"/>
    <File fileId="4" filename="$data/shaders/placeableShader.xml" />
  </Files>
So, at the beginning of the XML code for an I3D file, you will find the ‘file library’ where each file related to the I3D file is listed. It’s more like a drawer section where each drawer has its unique content. In this case:
- flowerpot01_diffuse.png (file ID 1)
- flowerpot01_normal.png (file ID 2)…
…ending with the file path to the shader (placeableShader.xml). And that shader isn’t the only shader used in Farming Simulator.
So what about the $data?
The (dollar symbol)data is simply a reference tag telling us that the ‘material map file’ – let’s just call it texture file hereafter, is to be found within the data-directory of Farming Simulator. Where is that located?
If you use your file browser within your operating system (Windows in my case), you will find a directory/folder named data where the EXE-file for Farming Simulator is located.
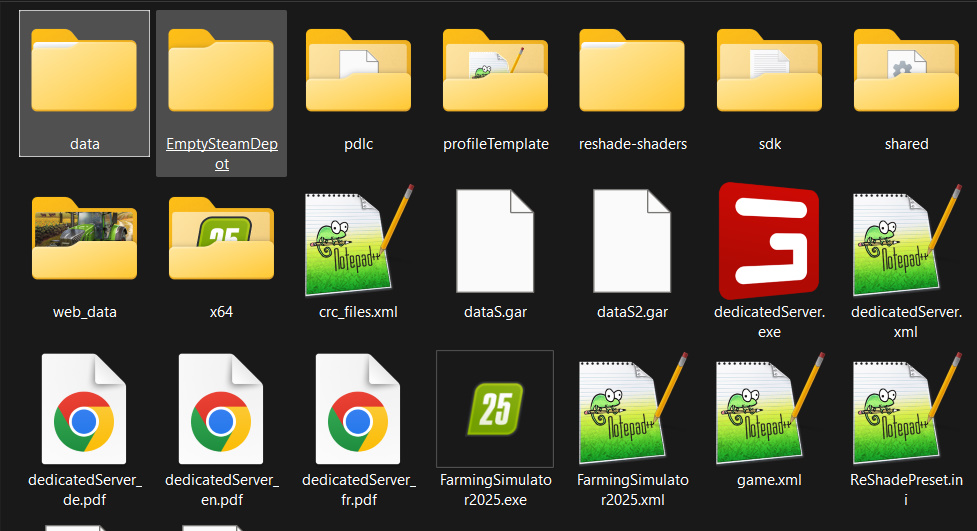
In XML code, that data folder is referred to as $data. After that, the names of the next subfolder follow – for example, $data/maps/mapUS/textures…until it ends with the file name of the specific file.
Simplified it tells GIANTS engine (the game engine itself) where to look for a specific file.
At the next page of this guide we are going to use an application called PaintNET to create a simple diffuse map.