
Making a diffuse map with PaintNET
PaintNET may look like a ‘throwback’ in time to older Windows applications. However, PaintNET is to be considered freeware/donationware compared to other image/photo editors out there, which very likely may cost you a fortune in subscriptions. I have used Photoshop many times, but for simple 2D graphics, I would more or less use 5% of its features. And that’s not worth it for a monthly or yearly subscription. I would instead give a slump of money to independent or open-source application developers rather than a somewhat greedy software company. Anyway, whatever you prefer to use and pay for is on you.
So, let’s begin by downloading Paint.NET from https://www.getpaint.net/download.html. If the link doesn’t work then just type getpaint.net in your web browser. You may also browse for the program in Windows Store.
Follow the installation process until you are ready to run the program. Now, I will list each step for how to make a diffuse map:
- Open/Run PaintNET
- From the main menu bar, click File and New… or press Ctrl + N on your keyboard
- In the pop-up, type in Pixel Size width and height to 512 pixels (in both)
- Create a new Layer by selecting Layers from the menu bar, then Add New Layer.
You will now see a one-coloured, flat 2D image. Next, I want you to download the picture below. You may also screengrab it directly if you have screen capture in Windows enabled with the PRINTscr key. Just click on the image below, and it will open up in a new browser tab in its full scale. Right-click the image and choose ‘Save image as…’
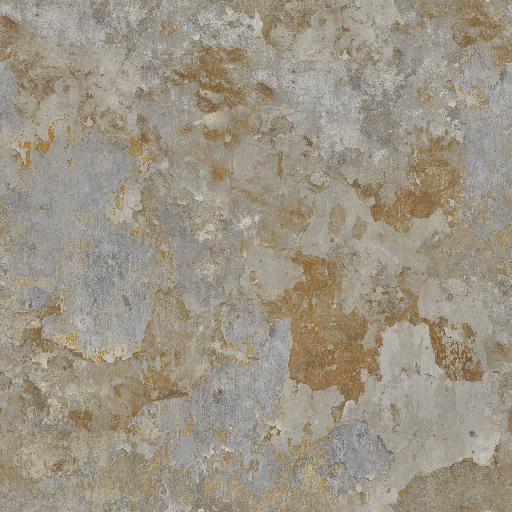
Please open up this image in PaintNET. If screen capture was used, please ensure it was captured in full resolution. This one is also 512 x 512 pixels in width and height. If screen captured, skip step 1-2 below. Otherwise, do the next steps:
- From the menu bar in PaintNET, choose Edit and then Select All or short key Ctrl + A.
- Next, at the menu bar, choose Edit again and then select Copy or Ctrl + C.
- Then, move over to the new image we created at the beginning with the one-coloured surface and choose from the menu bar Edit and Paste or Ctrl + V.
It should now look something like this inside PaintNET.
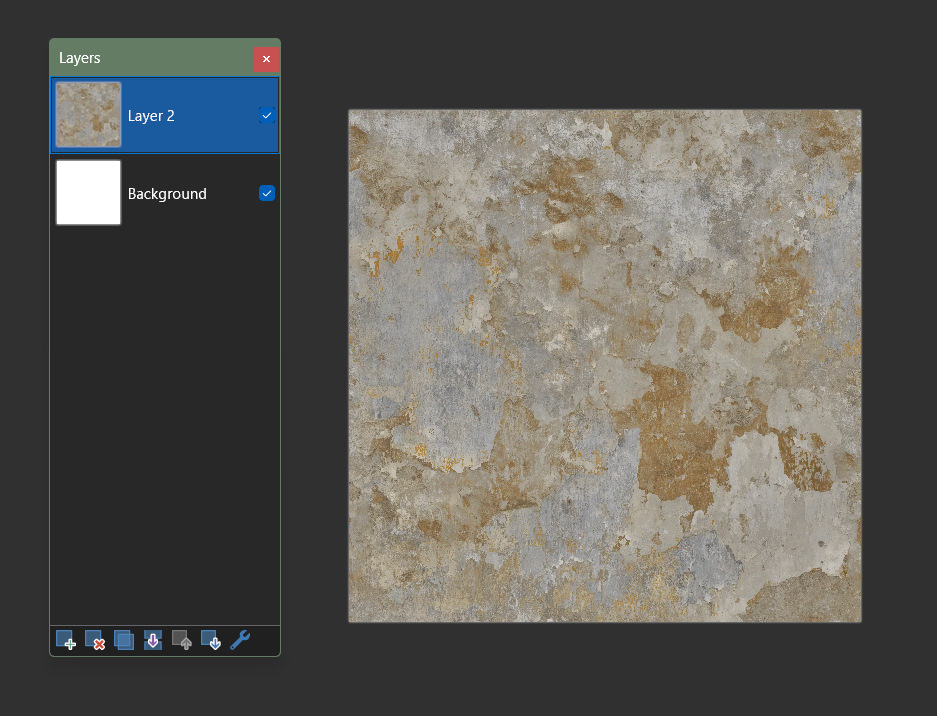
What we just did was copy and paste content into the layer we created—in this case, Layer 2. Layers can come in handy later when blending layers and using layer effects. But for now, we are just going to choose…
- File and Save As… or Ctrl + Shift + S
- Choose a folder you know about, such as My Documents, and perhaps create a new folder and name it myTextures.
- Change the file name to mytexture_diffuse and set file type to PNG.
- Hit the Save button, and a new window will pop up.
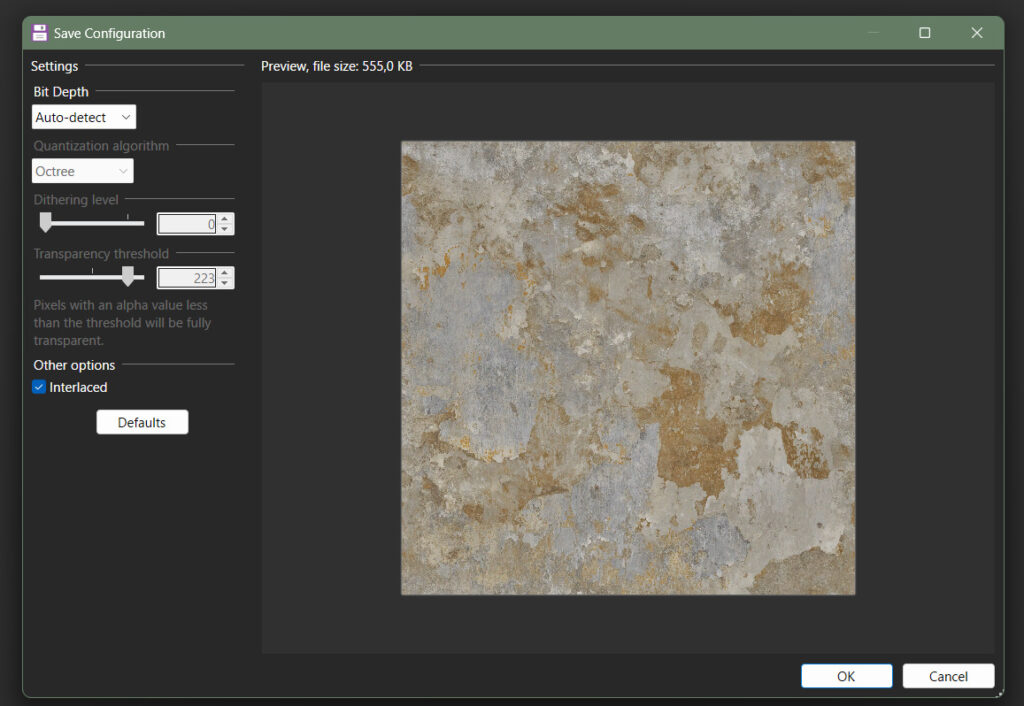
Make sure that the Settings are somewhat the same as shown above. Then just hit OK. If a dialogue is showing about layers, select Flatten.
That was just a simple way to create a texture in PaintNET using an already-made texture. 🙂 But anyway, this is the texture we are going to use to generate other textures with the application Materialize. More about that follows on the next page of this guide.